
How to add a Repair to a Helpdesk Ticket
Through in-house or through vendor repair, get your devices up and running and get them back into the hands of your team.
There are currently three ways to add a repair to a Helpdesk ticket that will be covered here. The next few pages of this guide will go into detail about how to manage and complete internal repairs and how to box, ship, and track vendor repairs
At Ticket Creation
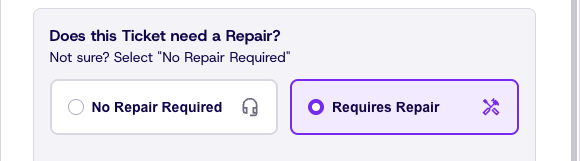
The first and easiest way to add a repair to a Helpdesk ticket is to add it at ticket creation. This follows the same steps as non-repair Helpdesk ticket creation, but we will toggle the Requires Repair bubble during ticket creation
Steps
-
Wherever you are in Dream™ click Create Ticket at the top of the page

-
After filling in the required Helpdesk ticket information, click Requires Repair
- For repairs an Associated Asset is required on the Helpdesk ticket
-
Fill out the required information
We will cover the remainder of the Repair fields over the next few pages of the guide as the process differs for internal and Vivacity repair
Through the Assets Page
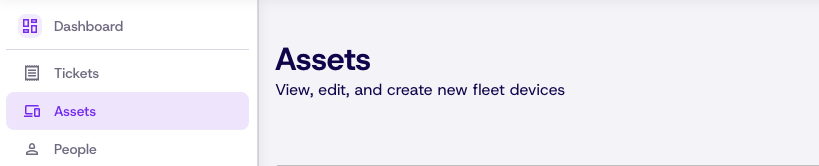
The next way that we will cover is through the assets page.
Steps
-
From the Assets page, find the device that requires repair by filtering or searching.
-
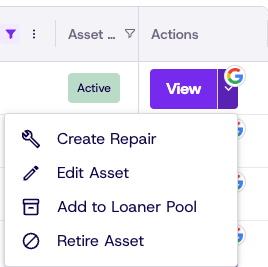
Next to the desired asset, open the dropdown next to view and click Create Repair
From an Existing Helpdesk Ticket
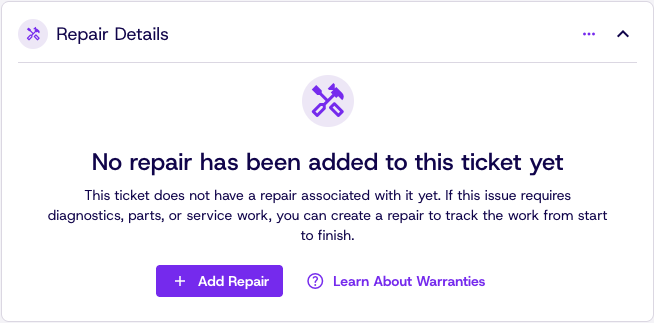
If you have already created a Helpdesk ticket and determine later that repair is required, repairs can now be created directly from the Helpdesk ticket.
Steps
-
Navigate to the Repair Details card on the Helpdesk ticket.
-
Click Add Repair
Updated 22 days ago