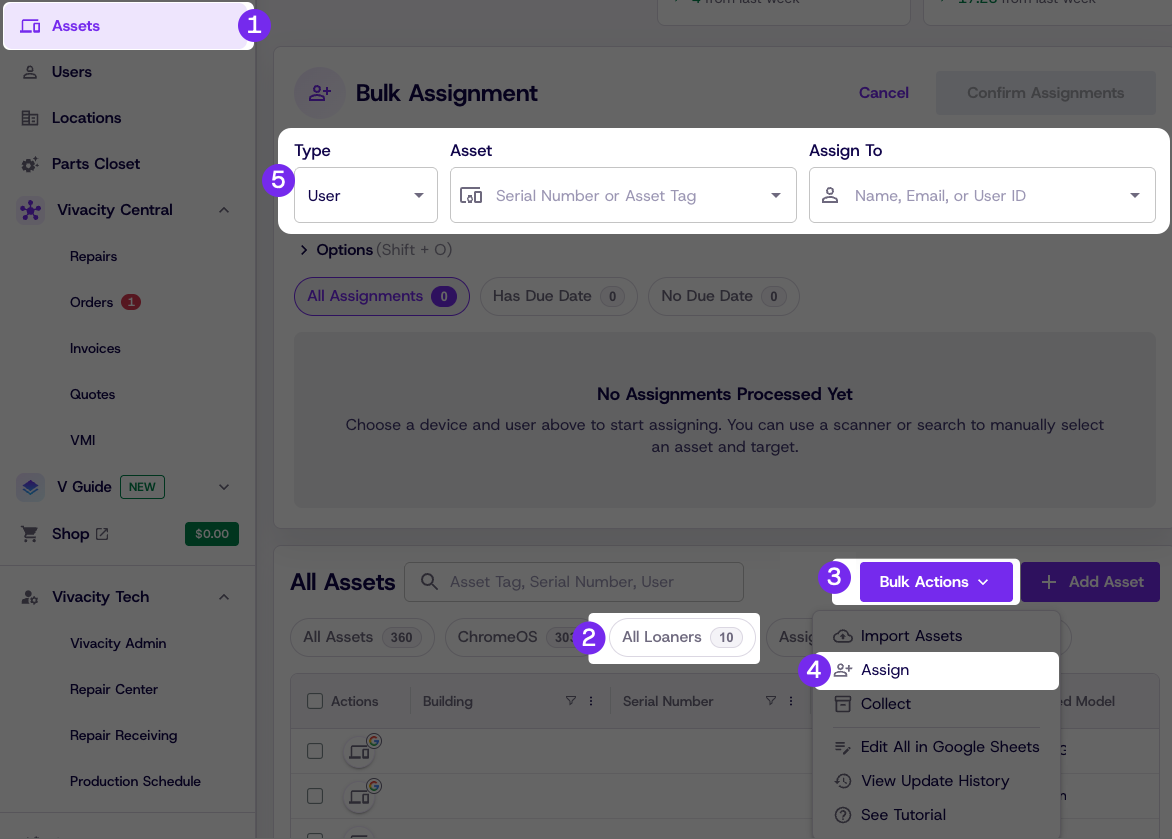
Jump to Content
Dream
DocumentationAPI ReferenceRelease NotesDiscussions
v1.0

Log InDream
Documentation
Log In
v1.0DocumentationAPI ReferenceRelease NotesDiscussions
All
Pages
Start typing to search…

Getting Started

  • Welcome to Dream™
  • Getting Started

Integrations

  • Prerequisites
  • Integration Setup
  • Troubleshooting
    • Verify GAC Telemetry Policies
    • Confirm GCP is Enabled
  • Dream Open API — Coming Soon

Account Settup

  • How to Add Users
  • How to Add Buildings/Sites
  • Verify and Bulk Add Fleet Devices
  • Notifications
  • Custom Roles

Tickets & Repairs

  • How to Create a Helpdesk Ticket
  • Helpdesk Ticket General Information
  • How to Create a Ticket for Vivacity Repair
  • How to Create an Internal/Student Repair Ticket
  • How to Add a Part During Internal Repair Ticket Creation
  • How to Add a Line Item After a Ticket Has Been Created
  • Parts Only Dispatch
  • General Repair Ticket Information and Editing

Assets & Inventory

  • Loaner Management
    • Loaner Management — Check Out
    • Loaner Management — Check In
  • Bulk Updates
  • Parts Closet
  • Vendor Managed Inventory (VMI)

Reports

  • Google Device Telemetry — Fleet-Wide
  • Google Device Telemetry — Individual Device
  • Searching, Filtering, and Table Customization

Orders

  • Order Invoices
  • Order Quotes
Powered by 
  1. Assets & Inventory
  2. Loaner Management

Loaner Management — Check Out

Use this process to check out a loaner device to a student or staff member.


Steps

  1. Click Manage, then click Assets

  2. Click Loaner Management

  3. Click Actions, then click Check Out

  4. Enter the loaner information

  5. Click Submit

Updated 2 days ago


Loaner Management
Loaner Management — Check In